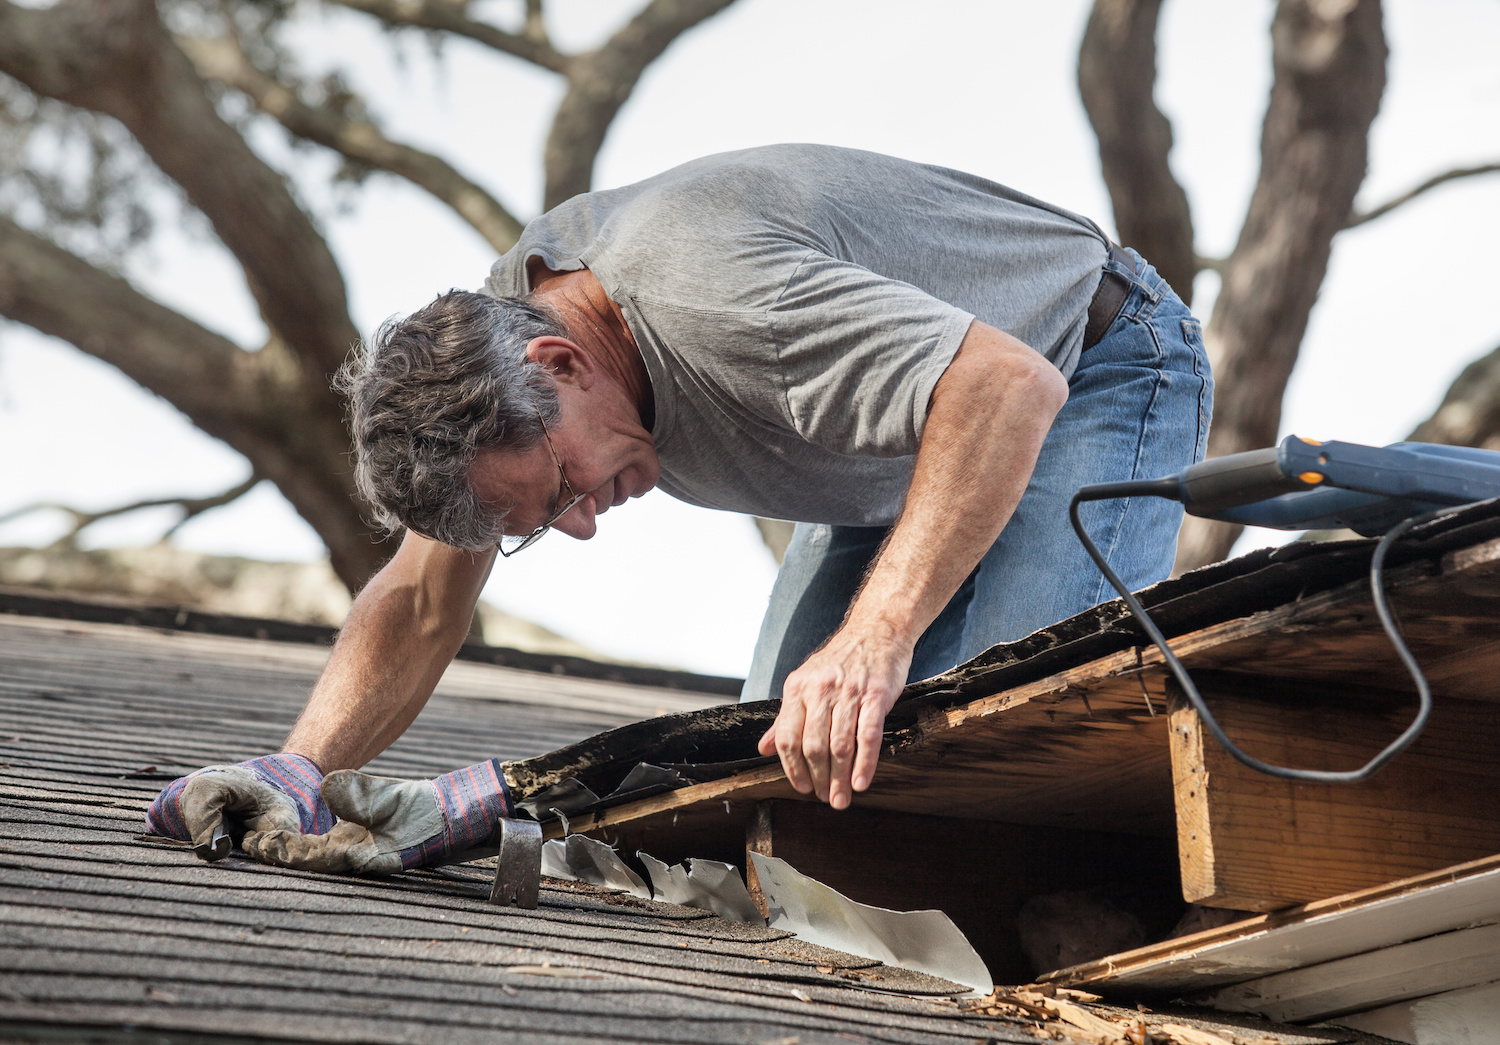
October in Texas City is when we start getting those cooler mornings, then a warm, wet afternoon rolls in and everything sweats. You do not always notice it until you see a brown ring on the ceiling near a wall, or the paint bubbles right over a bathroom fan. A lot of folks assume a shingle is missing. We climb up there and, more often than not, the shingles are fine. The leak is starting where the roof changes planes or has a hole punched through it.
That is flashing work. Metal, sealants, boots, and the way they overlap. Gulf wind pushes rain sideways, humidity keeps things damp longer, and small gaps at transitions do not get a chance to dry out. If you are seeing staining after a windy rain, or only on certain storm angles, flashing is where we start. (If you want the longer version on why this happens here, read wind-driven rain roof leaks in Texas City TX and handling humidity.)
Chimneys and wall lines: where step flashing gets skipped or buried
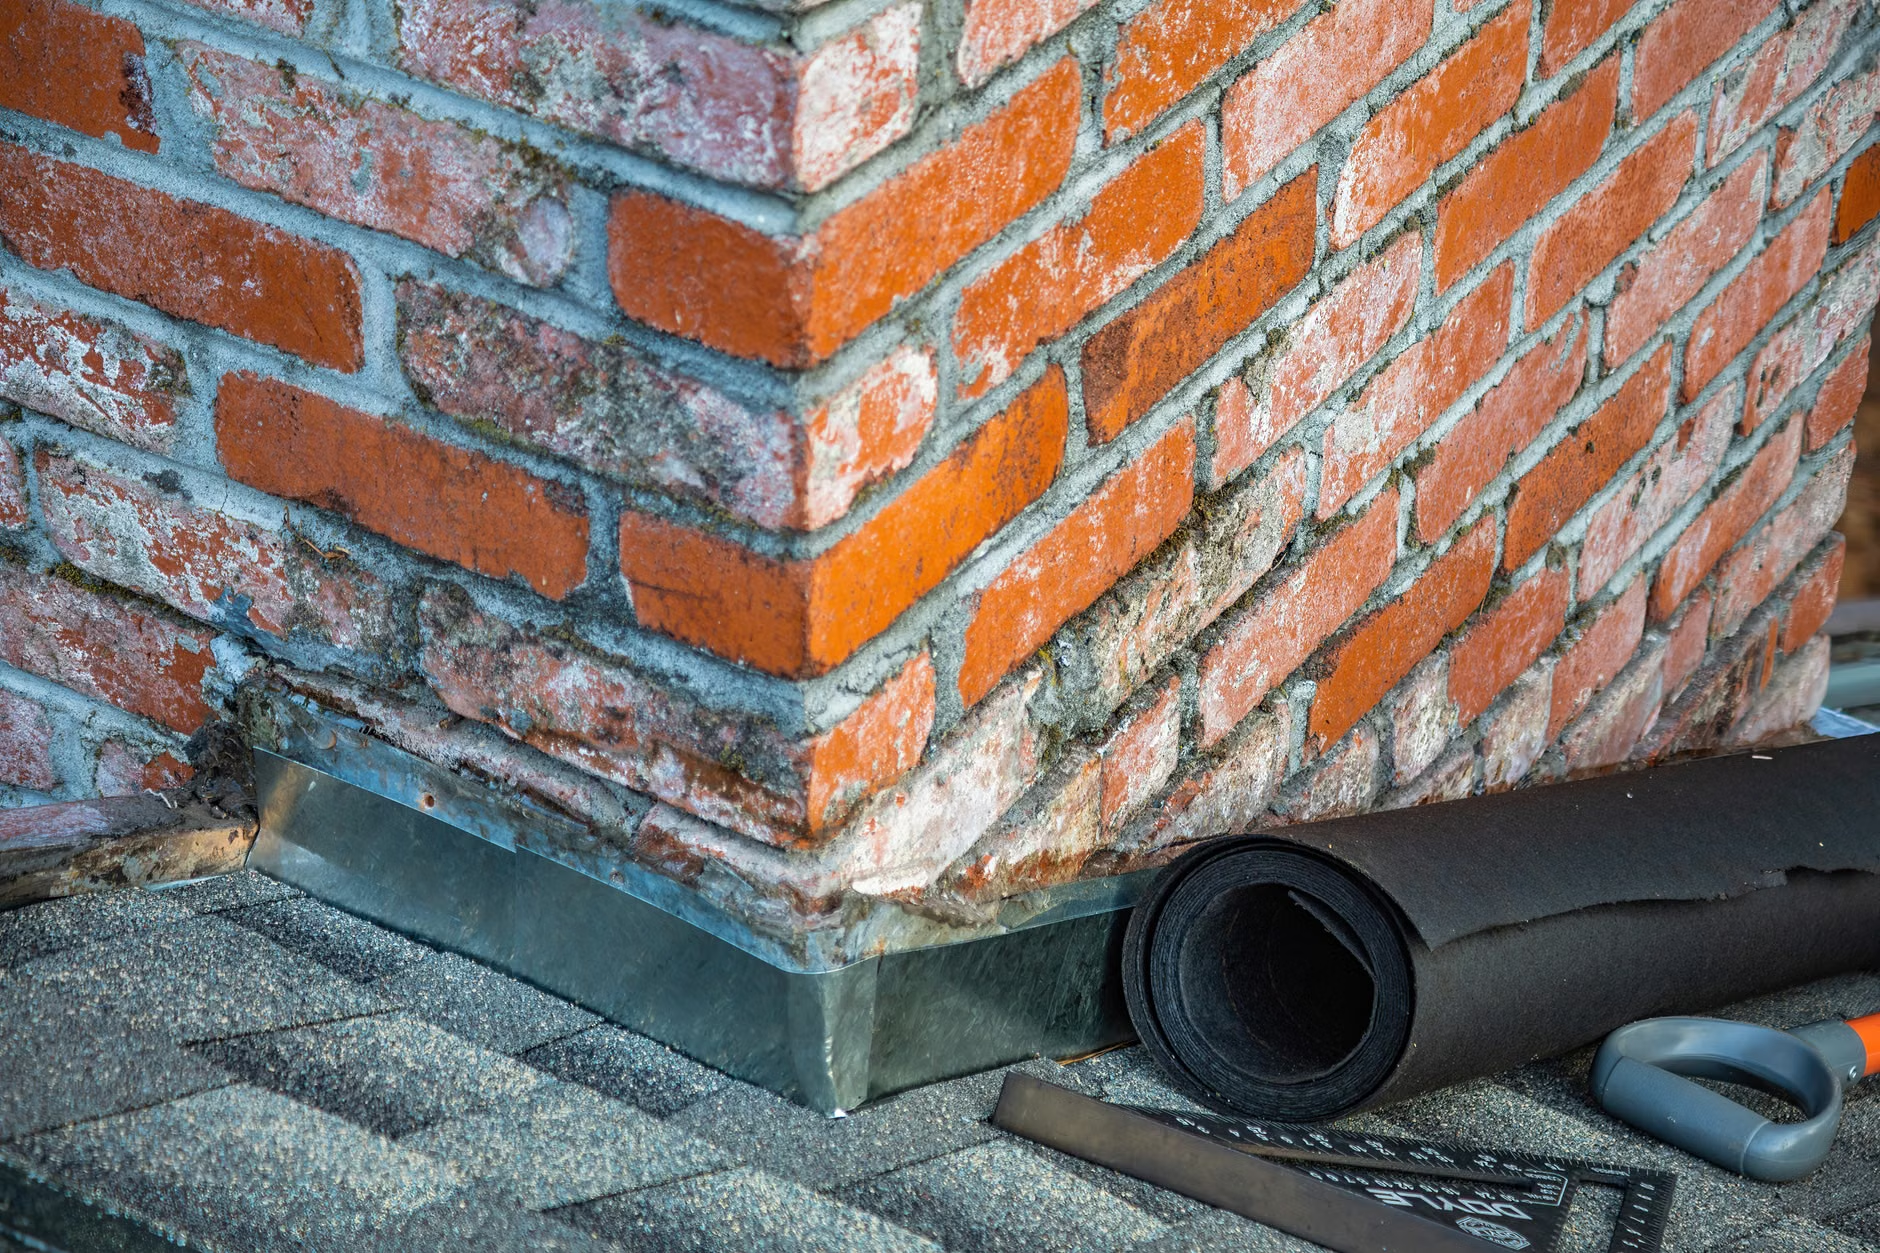
Any place a roof runs into a vertical surface is a leak magnet if the flashing is wrong. Chimneys, second story walls, brick veneer returns, even those small bump-outs with siding. The right setup is step flashing woven with each shingle course, plus a counterflashing that covers the top edge. Step flashing is individual L-shaped pieces, commonly 8 in. by 8 in., not one long strip smeared with mastic.
What fails in the field is usually one of three things. The step flashing is missing and someone tried to “flash” the joint with roof cement. Or the step flashing is there but nailed through the vertical leg, which puts a fastener in a wet zone. Or the counterflashing is cut too shallow into mortar and the reglet opens up.
In our climate, wet brick and damp siding stay wet overnight, so water keeps feeding that joint. If you see staining that tracks down a wall line and shows up after wind-driven rain, we look at the step pattern, the nail placement, and whether the counterflashing is actually doing its job.
Pipe boots and roof penetrations: rubber cracks, clamps loosen, nails back out
Most active leaks we chase start at a penetration. Plumbing vent stacks, furnace flues, electrical masts, satellite mounts, anything that breaks the shingle field. A standard plumbing vent boot is a neoprene or EPDM collar bonded to a metal base. The collar sits tight to the pipe. When it splits, water runs straight down the pipe and shows up in a wall cavity.
In fall, you will see the first signs because the roof cools at night and the pipe stays warmer. That temperature swing works the collar. On older boots, the rubber gets brittle and small cracks open up on the uphill side. On some installs, the boot was cut oversized and “sealed” with caulk. That caulk does not hold up.
Fasteners matter here. Exposed nails at the boot flange need to be placed high, covered by the next shingle course, and sealed with the right roofing sealant. We also check for pipe movement. A loose strap in the attic can let a stack wiggle, and that motion tears the collar over time. (If you are also seeing fasteners working loose elsewhere, nail pops on Texas City roofs ties a lot of this together.)
Valleys and dead valleys: water volume finds the smallest lifting edge
A valley is where two roof planes dump water into the same channel. In a heavy rain, valleys carry a lot of volume. If the valley metal is short, the underlayment laps are wrong, or shingles are cut tight with no water channel, water will ride up and under.
We see two common valley setups: an open valley with metal showing, and a closed-cut valley where shingles cover it. Both can work if they are built right. Open valleys need corrosion-resistant metal and clean laps. Closed valleys need correct weave or a clean cut line and, most importantly, no nails within about 6 in. of the centerline. A nail in the valley is a leak waiting for the next big storm.
Dead valleys are worse. That is where a wall or roof section funnels water into a short valley that has nowhere to go fast. You often find them behind chimneys or at the inside corner of an L-shaped roof. We look for a diverter, sometimes called a cricket or saddle, and we check the underlayment. If there is not an ice and water type membrane in that area, a small backup can get into the decking.
Drip edge, eaves, and rakes: the “first flashing” most people never notice
Drip edge is flashing. It is the metal that kicks water off the roof edge and protects the edge of the decking. On a lot of older roofs, there is no drip edge at all, or it is the wrong profile and water curls back.
At the eaves, the underlayment should lap over the drip edge so water sheds onto the metal and out. Along rakes, the drip edge goes over the underlayment in most assemblies to keep wind-driven rain from getting under the edge. Mixing those laps up is an easy way to trap water at the edge of the deck.
Fall is when we start seeing edge issues because leaves and small debris collect at the eave line and hold moisture. Even without a gutter problem, that wet line sits right on the fascia and the first row of shingles. If the metal edge is short, water can wick onto the plywood edge and swell it. Once the decking edge swells, shingles do not lay flat, nails lose bite, and the edge becomes a repeating leak point. (This is also why we keep pushing fall gutter cleanout in Texas City.)
We check for a tight hem, clean laps at corners, and solid nailing. Loose drip edge chatters in wind and opens gaps.
Flashing details that fail in Gulf wind: overlap, fastener placement, and sealant choice
Wind does not just blow shingles around. It pushes water uphill. That means flashing overlaps and end dams matter. Any flashing piece needs a shingle-style lap, water always on top of the layer below, and enough overlap that capillary action cannot pull water back.
We see failures where someone relied on sealant instead of geometry. Roofing cement smeared at a lap will crack. A bead of painter’s caulk around a flashing flange will peel. For roof work, we use sealants made for roofing, and we still treat them as backup, not the primary water stop.
Fasteners are another big one. A nail or screw placed low on a flashing face is sitting in water. Over a few seasons, that hole grows. On exposed fasteners, a neoprene washer can help, but it is not magic. If the washer is overdriven, it splits. If it is underdriven, it leaks.
We also look for metal thickness and compatibility. Galvanized steel, aluminum, and copper do not all play nice together when they stay wet. In salty air, corrosion speeds up, and pinholes in flashing show up before the shingles look “old.”
How we pinpoint a flashing leak without guessing or tearing up half the roof
A good flashing diagnosis is slow and methodical. We start inside. Water stains do not always sit right under the entry point. Water runs along rafters, decking seams, and even electrical cables. We look in the attic for darkened plywood, rusted nail tips, and wet insulation. A moisture meter helps, but your eyes and a bright light do most of the work.
On the roof, we inspect uphill from the stain, not just the nearest shingle. We check penetrations first, then wall lines, then valleys. We look for lifted edges, exposed nail heads, cracked boot collars, and gaps at counterflashing. On brick, we check the reglet cut and the sealant bead. On siding, we check that the step flashing is not buried behind a trim board.
If the leak is stubborn, we do a controlled hose test. One section at a time, starting low and working up, with someone inside watching. It takes time, but it beats replacing the wrong area.
When we do roof flashing repair in Texas City TX, the goal is to fix the entry point and the path, not just smear over the symptom. (If you are dealing with a fresh leak right now, roof leak in Texas City after heavy rain lays out what to do first.)
Repair vs replacement: when flashing work is enough and when the system is worn out
Some flashing issues are straightforward repairs. A split pipe boot can be replaced without touching much else if the shingles around it still have good seal strips and are not brittle. A counterflashing joint at a chimney can be re-cut and re-sealed if the step flashing underneath is intact.
Other times, flashing problems are a sign the roof system is at the end. If shingles are cracking when you lift them, the seal strip is failing, or the decking edge is swollen and soft, spot flashing work turns into a cycle. You fix one joint and the next weak point shows up on the next storm angle. (That pattern is common after long heat cycles, why Texas City roofs show problems after summer heat explains what we see.)
We also look at how many layers are on the roof. Flashing details get compromised fast when a second layer was installed over the first and the flashings were not rebuilt. Valleys get narrowed. Step flashing gets buried. Boots get stretched.
If you are planning a replacement after hurricane season, fall is a good window to get it on the calendar before winter fronts bring long, soaking rains. A full replacement lets us rebuild every transition, new underlayment, new flashings, and clean laps, so the roof sheds water the way it is supposed to. (If you are lining up timing, best time of year to replace a roof in Texas City is worth a read.)
Key Takeaways
- Most persistent leaks start at transitions, step flashing at walls, chimneys, and penetrations, not in the middle of a shingle field.
- Proper step flashing is piece-by-piece (often 8 in. by 8 in.) with counterflashing, not one strip sealed with roof cement.
- Pipe boots fail by collar cracking on the uphill side, or by movement tearing the rubber around the vent stack.
- Valleys should be kept nail-free near the centerline (about 6 in.), and dead valleys need extra membrane and water control.
- Drip edge protects the decking edge, and the underlayment laps have to be oriented correctly at eaves versus rakes.
- A controlled hose test, done in sections, finds the entry point without tearing up unnecessary areas.
Conclusion
If you have a stain that shows up after a windy rain, or only when the weather comes from one direction, we stop thinking about “a bad shingle” and start looking at flashing. That is where roofs leak in real life. Metal laps, boots, counterflashing cuts, nail placement, and the way water is guided at valleys and edges.
October is a smart time to get it checked. The roof is not cooking hot like August, and you have time to fix a weak transition before the next stretch of wet weather settles in. If you want us to take a look, we will trace the leak to the entry point and lay out what it takes to make that area tight again, no guesswork and no bandaids.